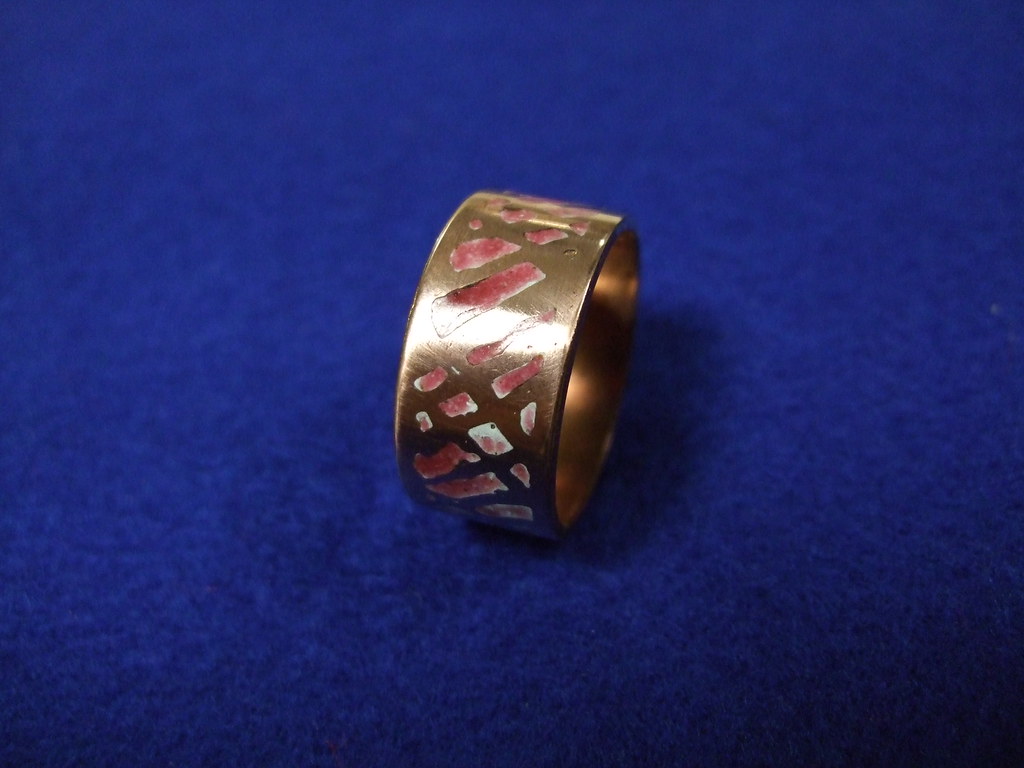
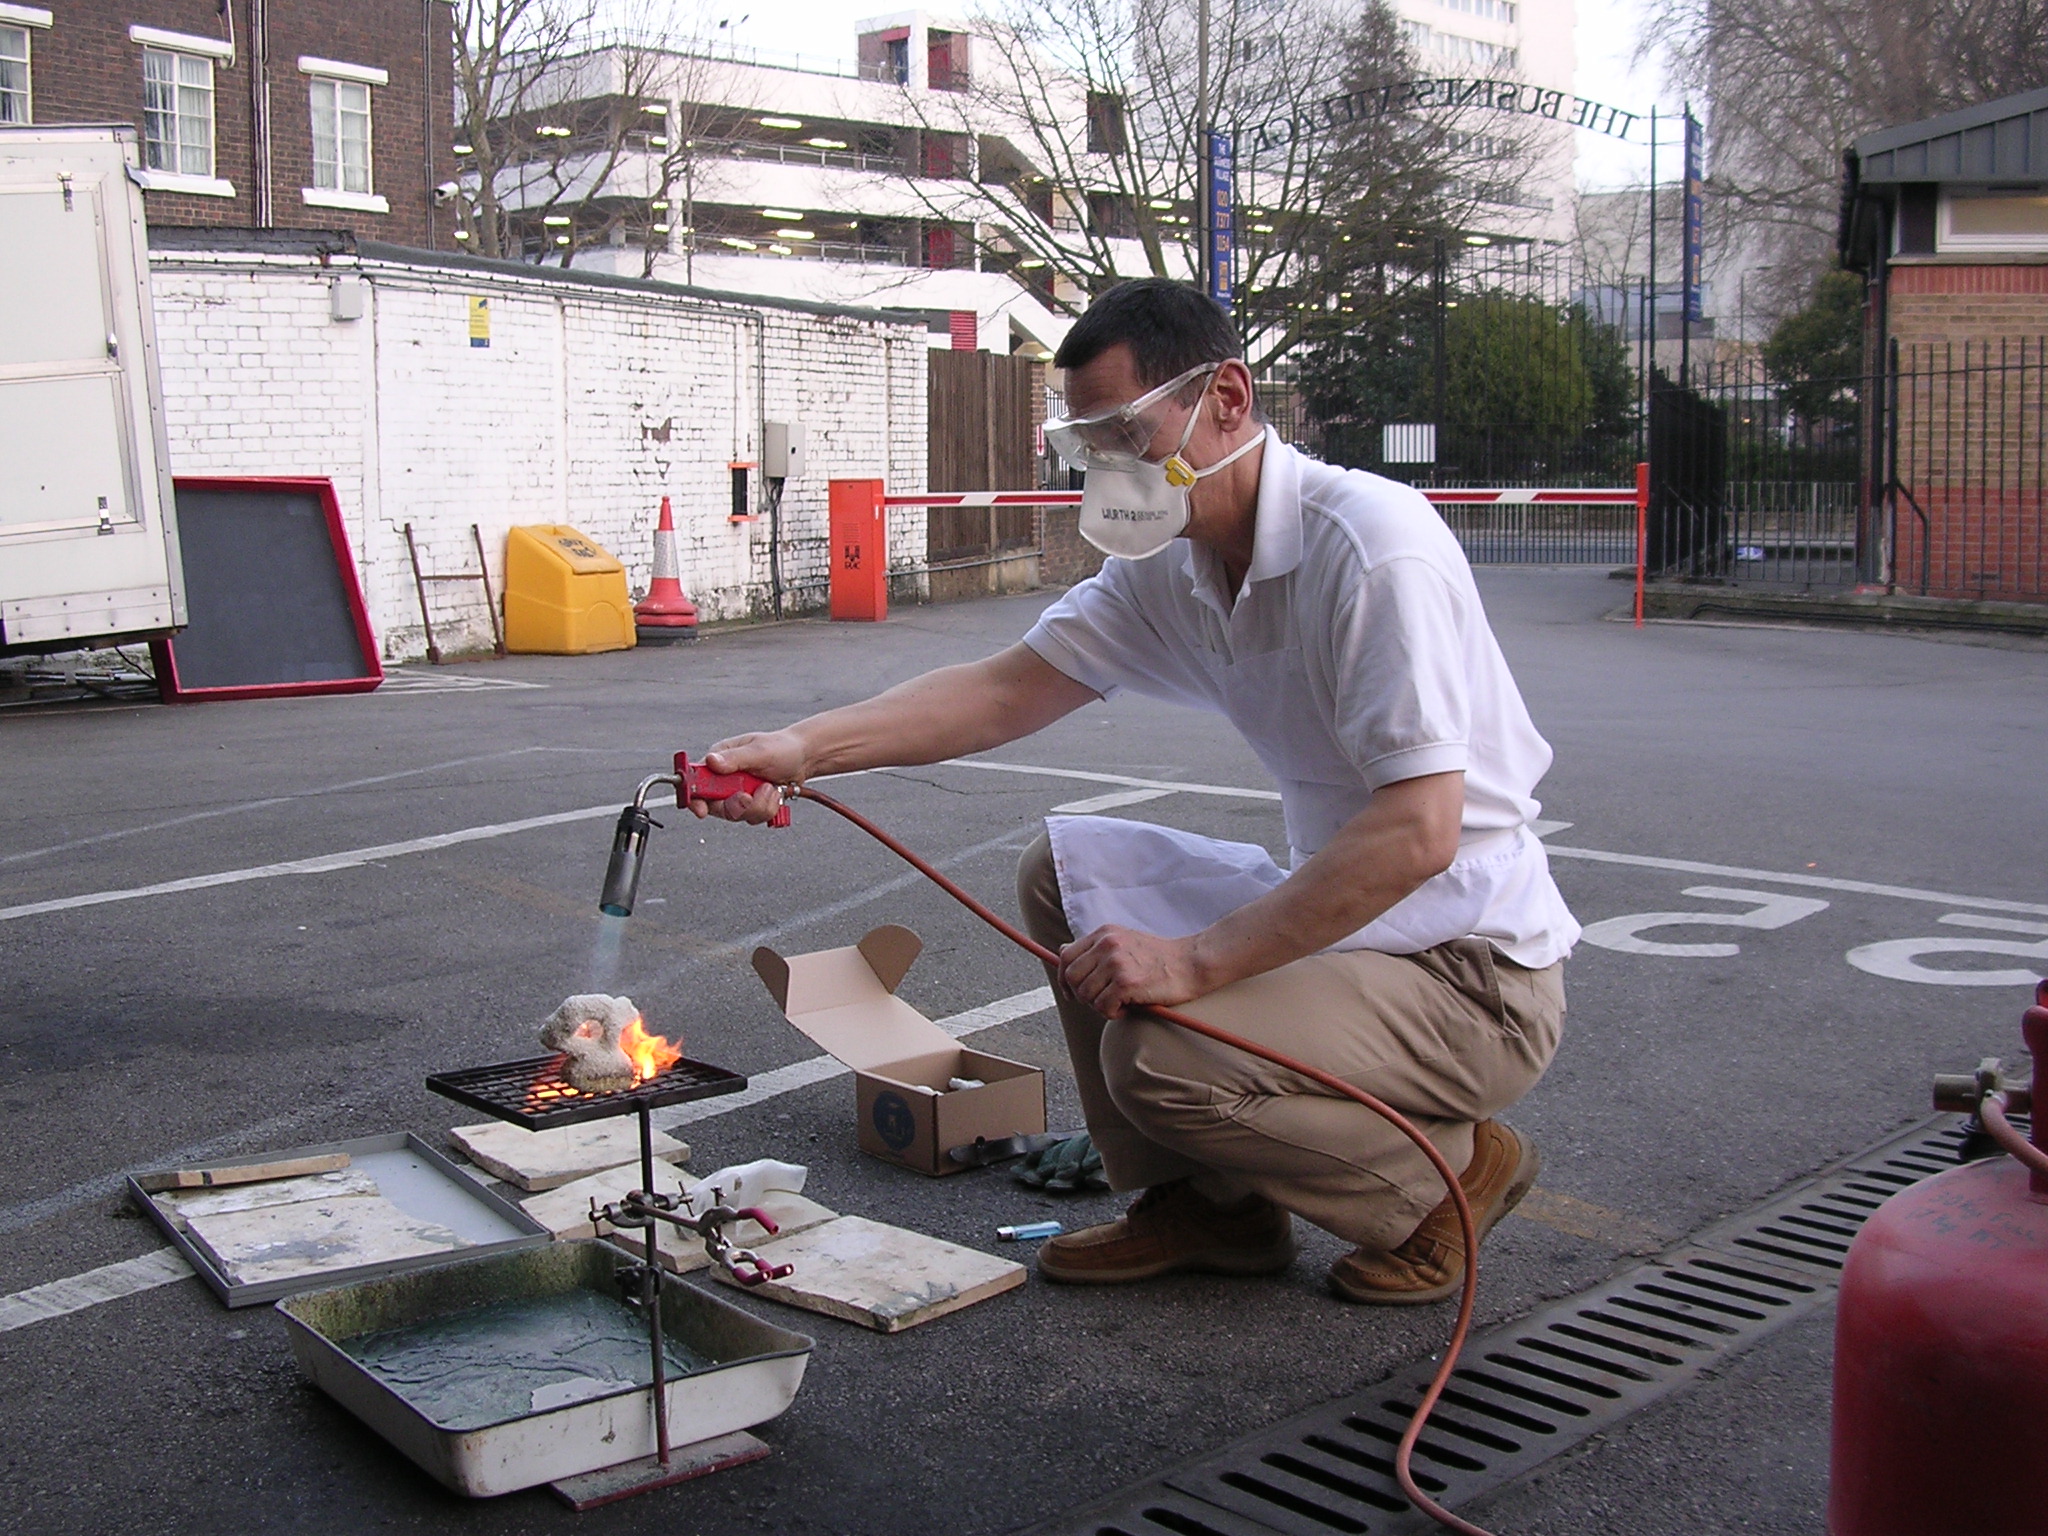
The details for removing enamel with molten lye are frequently kept hidden on the grounds that the technique is dangerous. My own assessment is that it is comparably dangerous to leaving work on Oxford Street in London on winter evenings, given suitable safety training for both activities. Other people's assessment may differ.
I cooked the object with the enamelled areas covered with about an equal volume of anhydrous sodium hydroxide ('caustic soda' or 'lye'), at about 400ºC (which is above the melting point of about 360ºC), in a tiny iron container (an old pot lid) in a small enamel kiln. I imagine a tiny copper pot would work perfectly well. The molten lye dissolved the enamel within minutes, and was then allowed to cool when it set rather rapidly into a grey-green mass. When sufficiently cold I irrigated it with a large amount (a bucketful) of cold then boiling water to dissolve the caustic soda together with reaction products. Usually I found that the enamelled object would be stuck to the pot with solid lye underneath, hence the boiling water to help dissolve it quickly.
See the footnote to this website for the disclaimer concerning safety! Lye is very caustic to skin (and in fact all human tissue) even at low concentrations and temperatures, so I wore goggles and rubber gloves. Solid cold lye can misbehave with water since it is an exothermic reaction, and I found that molten lye misbehaves even worse (explosively possibly) with even very small quantities of lye - hence the reason for waiting until all reaction products are cold, to avoid the risk of splattering hot caustic alkali around. Good ventilation is required - a small amount of injurious alkaline spray is produced which one wouldn't want to breathe in, and more if the alkali is not cold when added to water.
But, the pay off - the vast majority or all of the enamel simply dissolved away, and in those cases where some remained, it was removed by drying carefully then repeating the operation.
An alternative technique uses an aqueous paste of sodium chloride (common table salt) and potassium sodium tartrate (Rochelle Salt), applied to the enamel areas, then the whole heated to 750ºC. It is then plunged into cold water ('ice cold' is recommended on various sites). I found this was occasionally very successful, but sometimes only as good as plunging red hot enamel into cold water, and that it often never removed all the enamel even after repeated application. The use of such high temperatures and high temperature gradients on quenching is also likely to be problematic in some cases, causing warping for example. The chemistry involved seems to be unknown - the enamel is not dissolved, but seems to break away from the substrate more easily.
I also briefly experimented with molten potassium hydroxide for removing enamel with satisfactory results. The melting point is similar to that for the sodium salt; and the boiling points, at above 1300ºC for both, are sufficiently high to guarantee a stable temperature region of molten alkali. The potassium salt is of course potentially more reactive, and poses greater safety risks. It didn't seem to improve the removal of enamel, but was more effective than the sodium salt at removing ceramic shell investment from an old bronze specimen I had had lying around for a few years. As expected, it also severely degrades glass.
2008-12-11
Removing enamel with molten alkali
2008-10-18
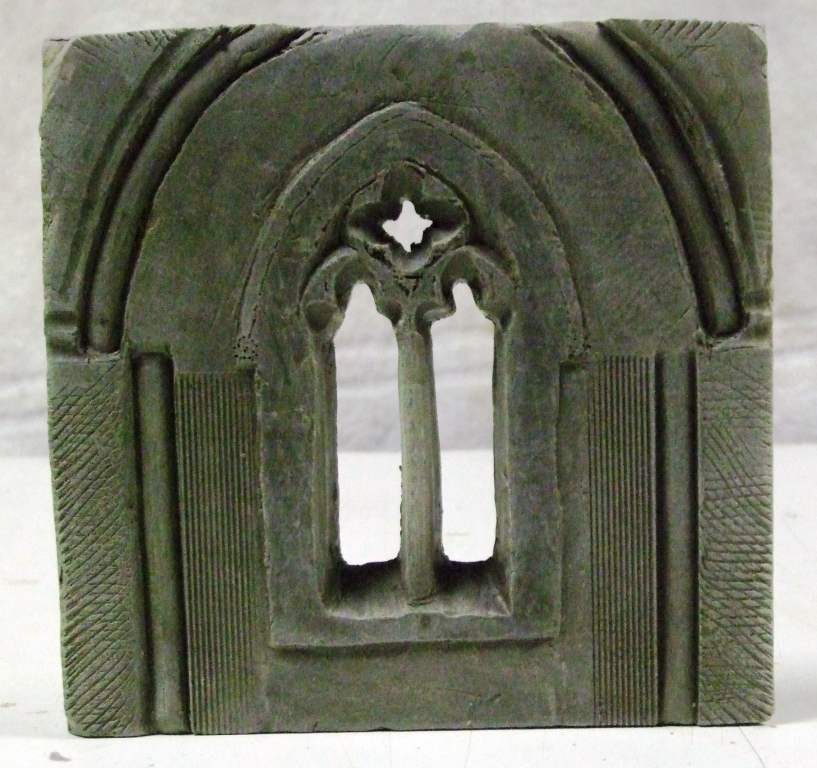
Meccano meets Anglepoise
I have only had time for a few small tinkerings over the past couple of weeks; these included trying to cast pewter in a way that embeds copper alloys for contrast (the idea came from Oppi Untracht's book and mostly failed, I need a means to secure the copper to the walls of the mold first); carving a design into a gesso panel using standard gravers (went very easily when the gesso was dampened); carving a discarded slab of leather-hard clay into a primitive Gothic arch; and making a very "Heath Robinson"-contraption to help when hand or machine grinding of cabs and other stones requiring a precision flat face.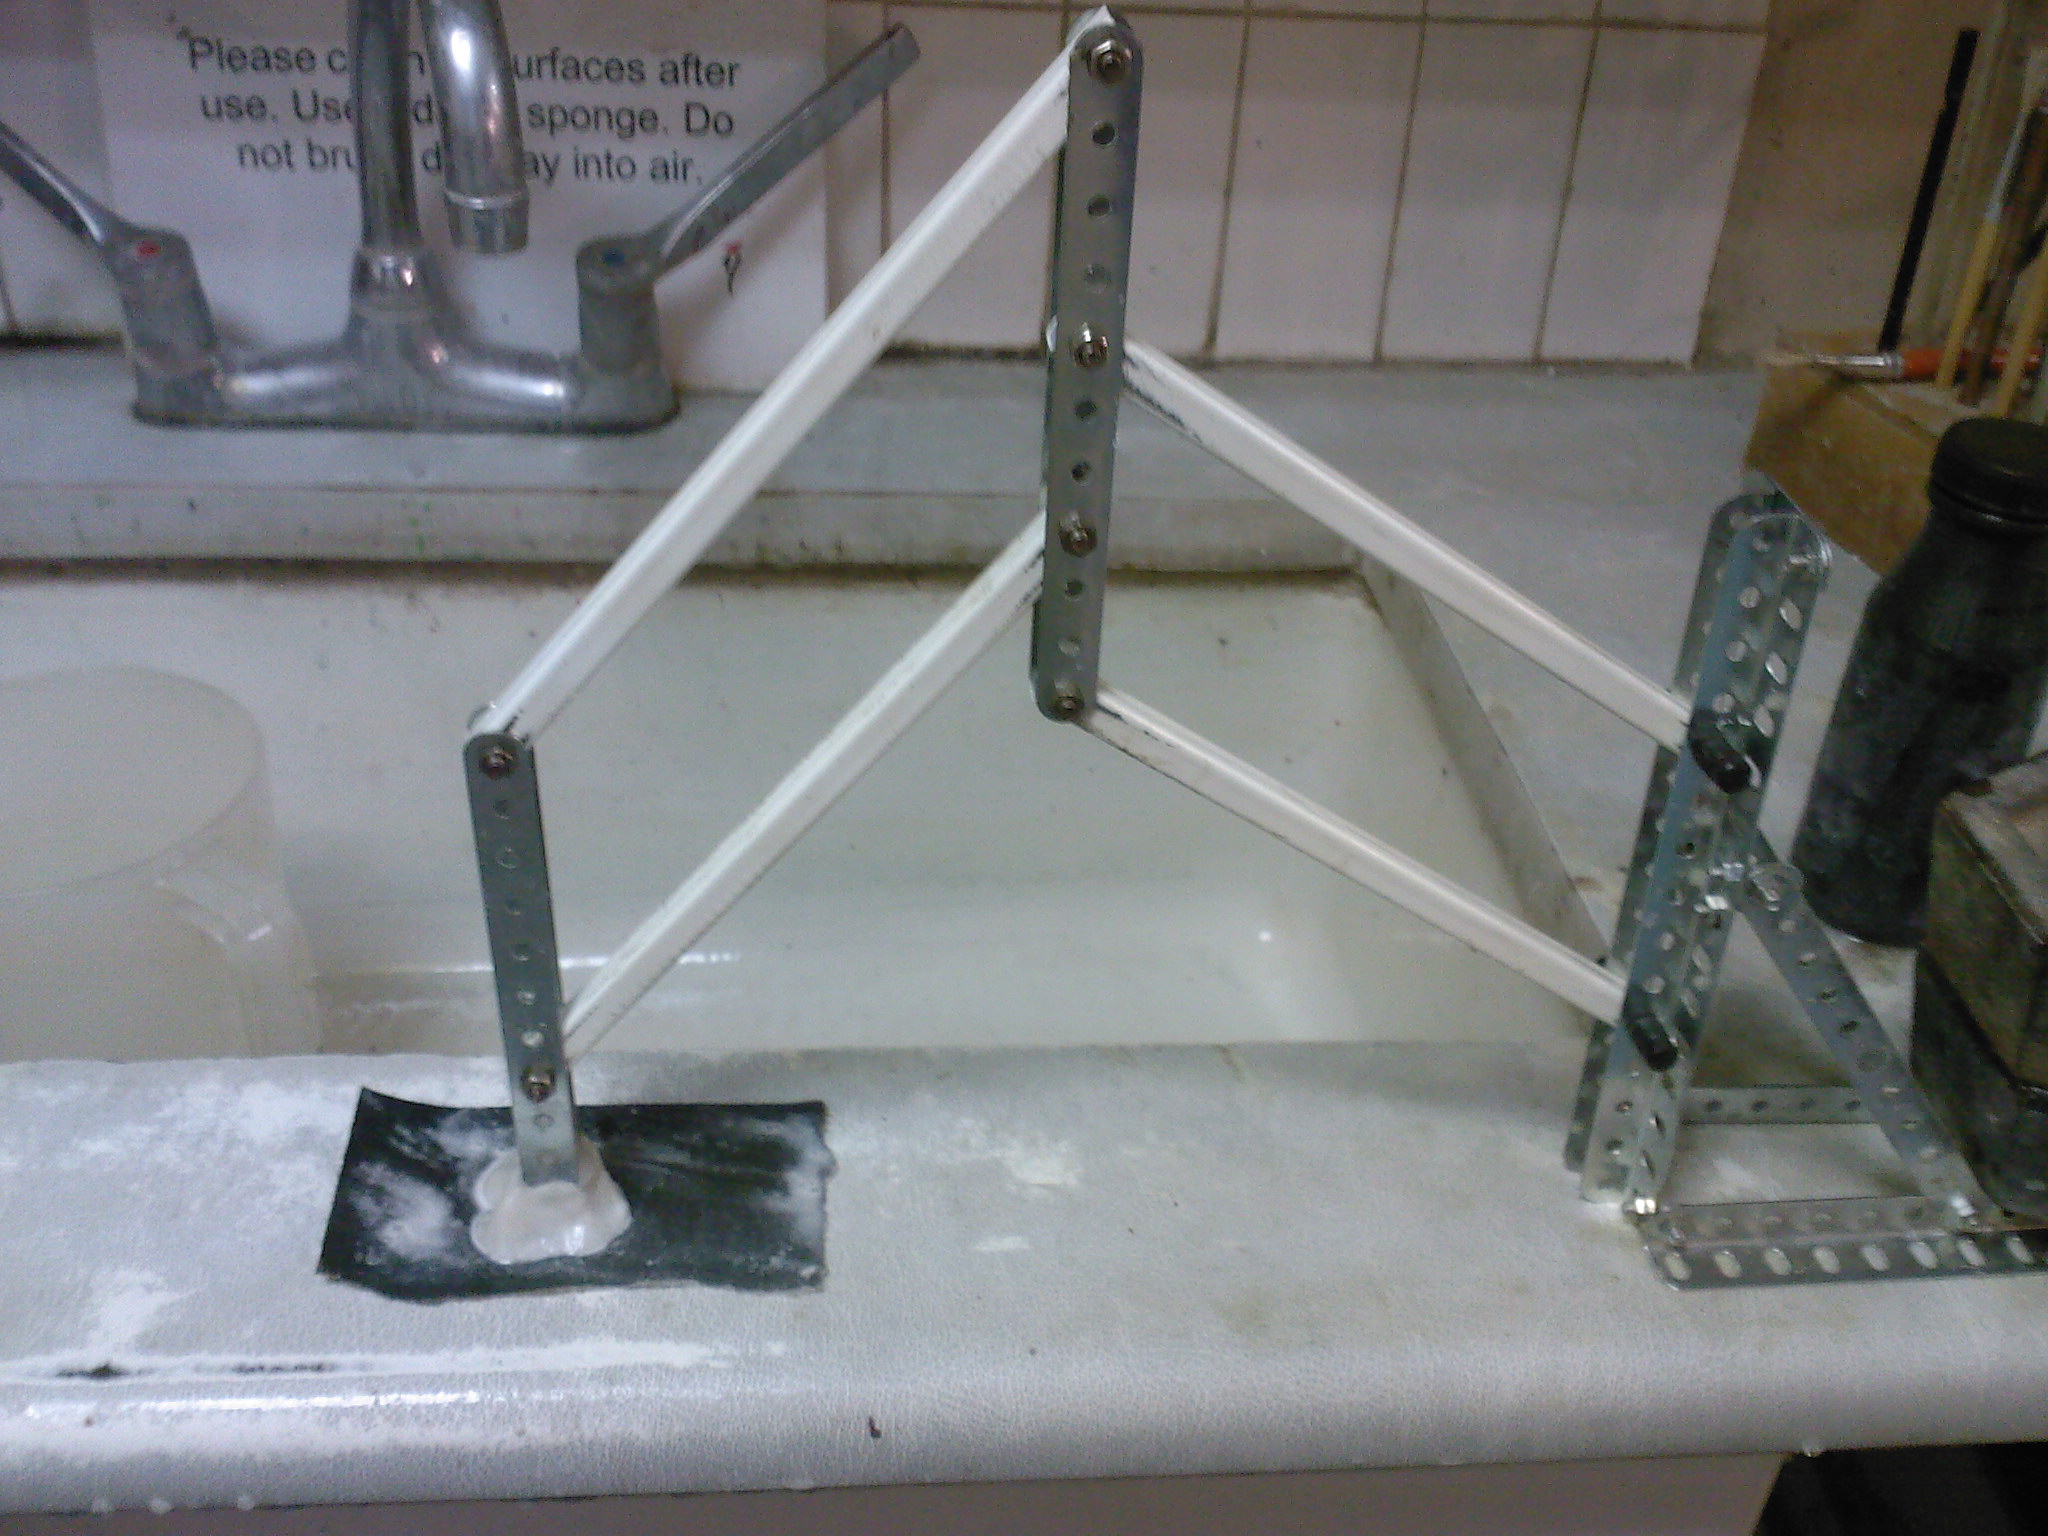
2008-09-26
A brief holiday
From 4th to 16th September I had a holiday in southern Turkey; mostly staying in Antalya, with a day at Phaselis, and 4 days at Kaş, all three on the coast. Very enjoyable, it's been a long time since I had more than a long weekend anywhere, although I never acclimatized very well to the daytime temperatures of 39C (or the night-time ones of about 28C). My thanks go to Kemal Özkurt of The Owl Bookshop, and to Harun Enez and Hussein Enez of Boncuk Bazaar (both in the Kaleiçi in Antalya) for looking after us so well.
Anyway, I found to my surprise that my brain performed noticeably better than it usually does (as measured by scores on Sudoku and Bobby Carrot [a Java game on my mobile], and remembering events for my diary!) which highlit the extent to which I have been flogging the poor thing.
Perhaps now I'll have the energy to actually make something, instead of watching others make things.
2008-08-18
Silicon bronze strip
By way of entertainment I soldered some scrap pieces of silicon bronze strip to some equally scrappy pieces of sterling silver.
2008-07-14
From chisels to gravers
Another staff development course financed by Central YMCA, I attended the first day of Working with Stone with Charlotte de Syllas as tutor, and the four days of Engraving with Wayne Parrot and Alan Craxford, both courses being held at the Sir John Cass Department of Art, Media & Design within London Metropolitan University. If time, timetable and cash had been on my side, I would ideally have also liked to do the remaining four days with Charlotte. Perhaps next time. I have already done quite a bit of lapidary work, and made a good start on fashioning a lacy agate cover for a cast silicon bronze seashell (pictures soon).
Engraving however is something I have not tried before, although I have used gravers for raising beads in pave work, and the main impetus for attending this course was to get to grips with gravers, as it were. I still regard them as one of the most difficult metal-working tools to do useful things with, and fortunately this course gave a good grounding for a beginner like myself, although it was really aimed at those who had already done a three day intro or had had some experience. But I started the course after talking to the Director, Alan Craxford, and things seemed to work out quite well. Wayne Parrot seems to be one of the few traditional fully-trained and experienced engravers around, and made an excellent tutor. Pictured below is my first crude attempt...

2008-06-23
More work with enamels
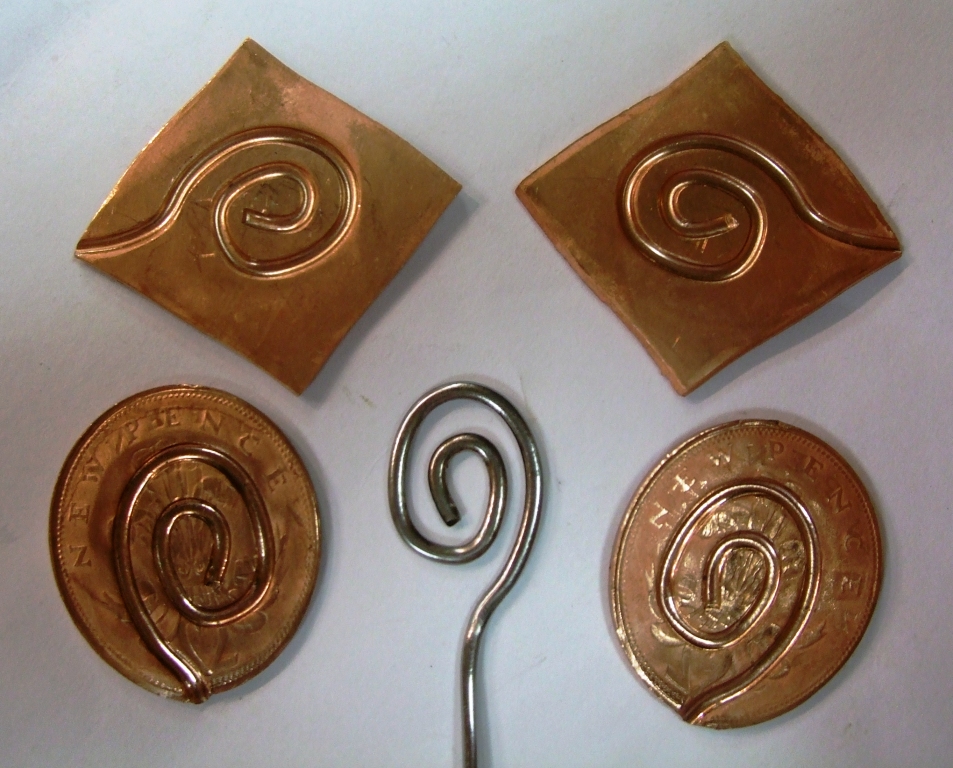
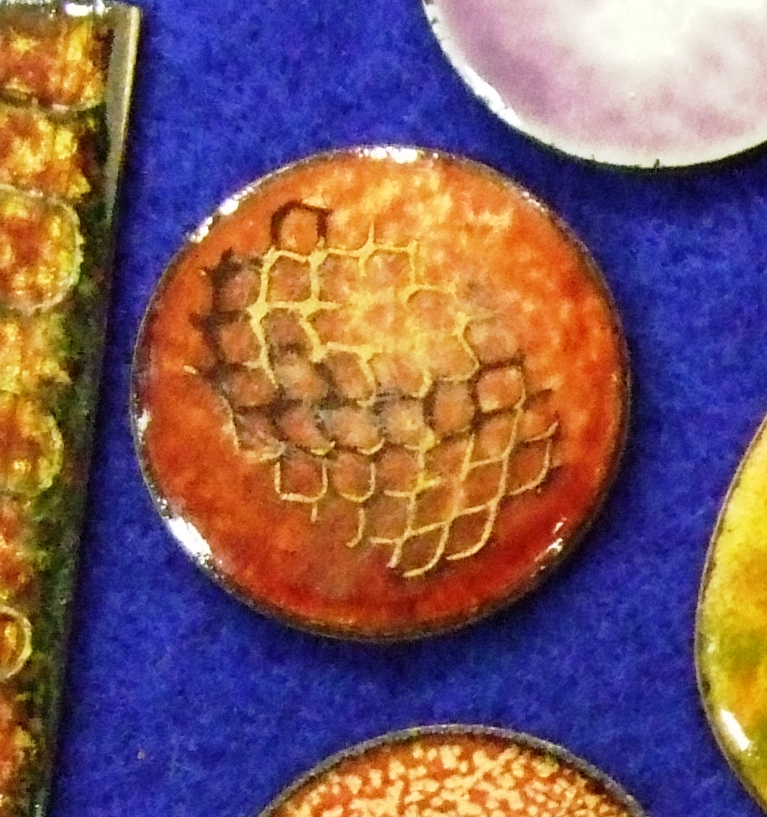
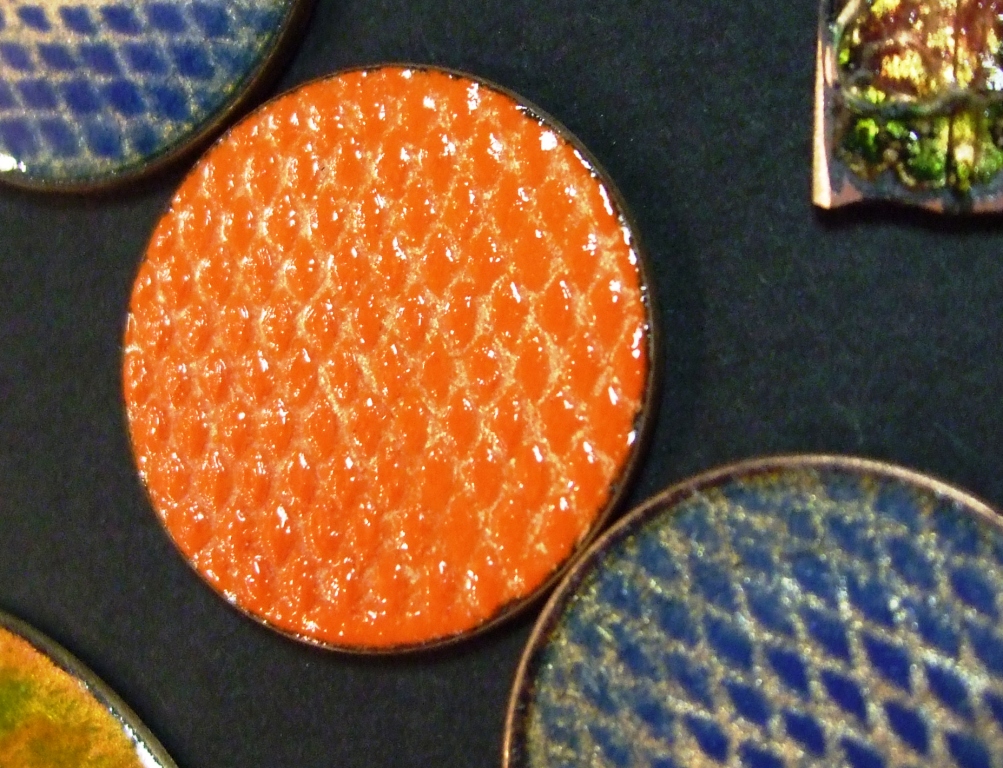
After the end of term (apart from a Friday sculpture class) I had enough spare time to tinker with some enamels. Some 'bronze' 2p pieces were rolled a little to reduce the surface detail, with annealing as required. These particular 2p pieces are now becoming uncommon; more modern ones are actually made of steel with an outermost thin layer of copper alloy. I use a magnet to separate them out. A 1.5mm steel wire was polished with sand paper then coiled into a shephard's crook sort of shape, and used between two of these rolled bronze coins to impress the design when the sandwich was again rolled through the mill. For good measure, I repeated the trick with two squares of 1.5mm annealed copper. I had intended to use these for enamel tests - see the picture in the right-hand bar.
2008-05-05
Making a silicon-bronze ring III
Although the rolled-out 0.5mm silicon bronze in part II below seemed perfectly acceptable for a ring liner, I thought I would substitute some of the fine silver I had recovered from sterling scrap. The thinking was that it was softer and would be easier to tinker with by hammering; also there would be a colour contrast, and less chance of copper staining for the wearer!

2008-04-20
Making a silicon-bronze ring II
The insert for the ring was originally made of silicon bronze strip 13 x 0.5mm after rolling. This was cut nearly to size and rolled round in a ring former. It was then slipped inside the domed ring and the butt edge scratched with a scriber to give some idea of where to cut. In fact, I found one needed to allow about 0.8mm to get a perfect fit. It was soldered with hard solder in a similar iron wire ring to that for the dome, but smaller in diameter. An even larger gauge iron wire, springy and very tough, was used to pull this ring apart during heating to re-adjust the solder seam – very inventive, but not quite inventive enough since the ring went shooting off into the room. After re-soldering, pickling and cleaning, it was a nice fit in the domed ring.
However I felt it was unnecessarily heavy, so repeated the process of making a plain band with 13 x 0.25mm silicon bronze strip. In all cases for this project, repeated use was made of the enamel kiln set to about 800ºC for annealing. This satisfactorily softened the metal, but the darkened surface was quite resistant to removal even with hot acid, taking additional scrubbing with wire wool. Subsequently, I felt that I should remake the inner band a third time, this time wider, so that it could be riveted up the sides – the extended rim looked nice.
2008-04-16
Making a silicon-bronze ring I
I cut two rectangular strips of silicon bronze, 37 x 1 x 12mm, then wished I had super-glued them together for the subsequent filing square of the ends and the long ends. The original stock strip was 1.5mm, annealed and pickled, rinsed and washed, then rolled to 1mm. It was a great help to hold the emerging end of the strip with parallel pliers as it came from the rollers, my hand holding the pliers elevated with a suitable board and movement facilitated with a sheet of plastic underneath. Even better probably would be a suitable emergence table at the exact right height. I used dividers to mark the strip, at 37mm and 38mm for sawing in between; and placed a strip of balsa wood on the bench peg to help steady the strip for sawing. This was done twice to give two rectangular pieces 37 x 12 x 1mm, they were superglued together and left until dry in the vice. Then they were filed as necessary for squareness, before placing in the enamel kiln at dull red heat to break the bond and anneal.
For doming, I bent a piece with pliers until it fitted into the largest dome, domed it, and repeated until I had reached the 26mm dome, the smallest hollow that this size strip would still fit inside. The strip, on bending slightly, now sat in the 25mm dome with 2mm protruding, therefore there was a line inset 2mm from the edge caused by the last doming operation. The resultant ring was oval at 25 x 25.5mm. Sanding the short edges by holding them flat on sandpaper (painful on the fingers, especially if using a steel block to try and ensure registration with the other dimension) got it to a nice circle at 25mm diameter. My feeling is that using the steel block is a waste of time, and doesn’t help any kind of squaring operation. However it is possible that the rounding of the corners of the short edges using the block was entirely due to swapping faces pressed against the block, without having taken steps to absolutely guarantee that the two faces are exactly parallel. So I suggest use face A on block, edge on sandpaper; then edge on block, face A on sandpaper; then edge on block, face B on sandpaper; but never face B on block and edge on sandpaper – this would accumulate an error! Mark near face B with ink to reduce the chance of a mistake.
For soldering, I hit on a happy idea – a circle of strong steel wire stuck out in space, the two halves of the ring aligned and dropped into this slightly smaller circle to merely sit there. Then solder from the base – this worked perfectly.
2008-04-12
Cleaning sterling grains
The sterling grains I had made (by re-melting and pouring into water about 500g of silver from a previous failed casting venture), gradually looked very dirty on the surface. They were steeped in sodium carbonate solution sat on aluminium foil for some days, which made them noticeably worse. Subsequent steeping in sulphuric acid made no change; nor permanganate, peroxide or bisulphite! I melted one of the larger lumps with some borax to get an interesting set of colours; white as in clean sterling on the part in contact with the crucible bottom, black on most of the top as in oxidised sterling, and a fluorescent yellow / green (which had been very golden in colour when red hot) on part of the top, possibly caused by the borax flux. The lump of silver was dumped in sulphuric acid for a couple of hours. Incidentally, these grains had been satisfactorily used to cast student work in early spring.
Subsequently I placed all the remaining tarnished grains in a ceramic shell open mould and set it in the enamel kiln at around 800°C and left it to reach dull red heat. On removal, as hoped, the surface of all the grains had changed from a kind of creamy mushroom grey to dark grey. They were cooled and dumped into dilute sulphuric acid, which satisfactorily converted the surface into the kind of clean white I associate with sterling silver.
2008-03-10
Etching glass III
A surprise shipment of ammonium bifluoride meant that I spent another hour re-masking some frosted glass with Sellotape, adding a design in nail varnish, then sealing it into a plastic tub containing 10% sulphuric acid with 20% of the new bifluoride.
The equation for solution of silica in hydrofluoric acid is generally given as
SiO2(s) +6HF(aq) → H2SiF6(aq)+2H2O(l)
The result is fluorosilicic acid. After an hour it was obvious that ammonium bifluoride was, as expected, a much stronger etching agent than the sodium salt. However the demands of administration of courses for next term (starting 14th April) mean that I will have to shelve the project for a few days at least.
2008-02-24
Etching glass II
A small piece of window glass was uniformly frosted with 45 micron diamond powder made into a paste with glycerine (using a flat glass muller) then washed and dried. The reverse was masked with Sellotape, and a design painted on the front with nail varnish. After thorough drying, it was re-etched by immersion in 15% sulphuric acid with about 10% sodium bifluoride added, in a sealed plastic container for about 24 hours.
The results after this time were disappointing, with no apparent change in the frosting when wet. After washing and drying, again there seemed little change in the frosting - at least for the first few minutes! After that, to my astonishment, a dendritic growth of what seemed to be white crystalline material appeared over the whole of the exposed glass surface, taking about 5 minutes to cover it entirely. On scraping with a blunt plastic tool, it was found to be some kind of loose surface material, presumably silica-based. It was again washed, and the masking agents removed. This plainly showed a difference in the etching texture given by diamond paste compared with the chemical etch. I need to research the nature of silica degradation by bifluoride!
2008-02-21
Etching glass I
I like equally the effect of both etched metal and etched glass. But the latter requires use of hydrofluoric acid or equivalents, which is not fun to use at all. It demands a fume cupboard and a professional approach to personal protection equipment.
So I have been experimenting with a potentially safer alternative, namely bifluoride salts. Unfortunately I have not been able to find a supplier of ammonium bifluoride, the salt of choice because of its high solubility in water. Instead I have to make do with sodium bifluoride, which has very limited solubility.
My present interest is in 'bite & grind' which refers to etching a design onto sheet glass, and grinding the design in selected areas with a flat glass pad loaded with diamond abrasive and glycerine as a lubricant. Sometimes one might use 'grind & bite' instead.
Work is going slowly at the moment since this is the middle of the spring term and most of my time is taken up with teaching and administration; and early next week is scheduled as the 'casting days' for two different classes, using silicon bronze, silver and pewter depending on the students' interest.
2008-01-06
Tree of life
My favourite organisational concept (a tree, that is). After a sleepless night (the result of too much Xmas cake probably), I woke up with a desire to fire up the old Bloodshed Dev-C compiler on the laptop. One of my university lecturing specialities before I retired, was teaching algorithms & programming techniques. So, designed a nice recursive Win32 tree program (more entertaining than Sudoku), and spent some hours tinkering with it until I liked the details. Squished it with Gimp (open-source graphics software), annotated it with my original blog title and sub-title, and replaced the old blog pic with this new & perhaps rather apocalyptic version.


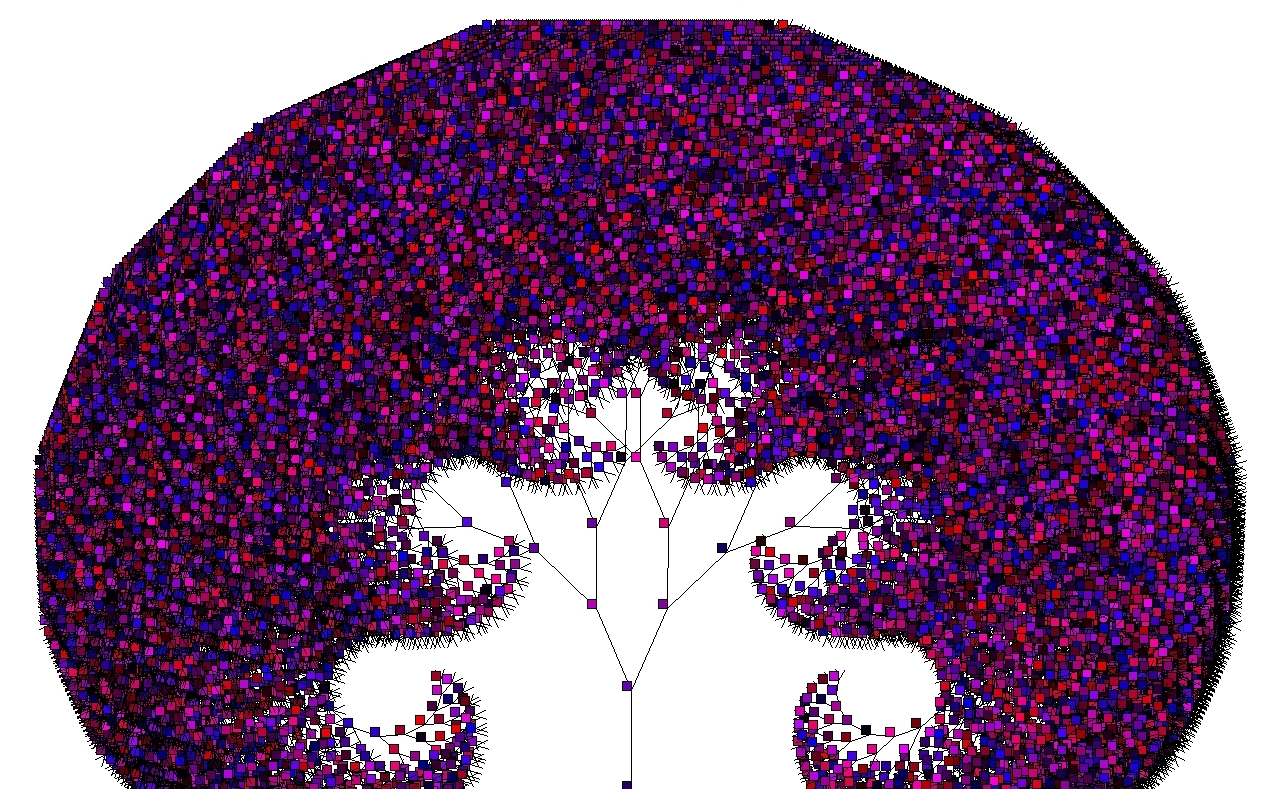
For those readers not familiar with recursion, it is a method of specifying an algorithm or procedure that invokes the algorithm itself within the body of the specification. An oft-quoted example is "...and God created man in his own image..." which could be criticised (somewhat tongue-in-cheek) as having various defects when matched against the humdrum requirements of computers; it has no stop condition, does not anywhere reduce to an element which can actually be created (or indeed change in any way at all), has no clearly specified engine to run the algorithm on...